Updated November 9, 2026
Quick answer
If floss shreds, snaps, or simply will not fit between your teeth, you are not doing it wrong — your teeth are just tight. And tight teeth are exactly the ones that need cleaning between them the most, because plaque and food get trapped in those narrow contacts where a toothbrush can never reach. The …
If floss shreds, snaps, or simply will not fit between your teeth, you are not doing it wrong — your teeth are just tight. And tight teeth are exactly the ones that need cleaning between them the most, because plaque and food get trapped in those narrow contacts where a toothbrush can never reach.
The good news: tight teeth are cleanable. You just need the right tool and the right technique. This guide covers which floss actually slides through tight contacts, when an interdental brush or water flosser helps (and when it doesn’t), the step-by-step C-shape flossing technique, what to do when floss gets stuck, and how to handle the hardest spot of all — the back molars and wisdom teeth.
Short answer: For tight teeth, use waxed floss or a smooth glide (PTFE) floss — or thin dental tape — and curve it into a C-shape against each tooth. Clean between your teeth once a day. Interdental brushes only work if they fit without forcing; a water flosser is a useful extra, not a replacement for floss.
Why Tight Teeth Are So Hard to Clean
Your teeth touch each other at contact points — small areas where two neighbouring teeth press together. When those contacts are tight, there is almost no gap at all. That is normal and even healthy: tight contacts stop food from packing between your teeth every time you eat.
But they create a cleaning problem. A toothbrush cleans the front, back, and chewing surfaces of your teeth. It cannot squeeze into the contact point. The sides of your teeth — roughly a third of each tooth’s surface — never get brushed at all.
What builds up there:
- Plaque — a sticky film of bacteria that forms within hours. Left alone, it hardens into tartar that only a hygienist can remove.
- Food debris — tiny fibres and particles wedged at the contact point, feeding the bacteria.
- Acid — plaque bacteria produce acid after you eat or drink anything sugary or starchy. Trapped between tight teeth, that acid sits against the enamel for longer.
That is why cavities so often start between teeth, where you cannot see them, and why gum disease usually begins at the gumline between teeth. The American Dental Association (ADA) recommends cleaning between your teeth once a day, with floss or another interdental cleaner, in addition to brushing twice a day.
Tight teeth make this harder in specific ways:
- Standard unwaxed floss frays and shreds on the tight contact.
- Thick floss or tape will not pass through at all.
- Floss can get stuck, and yanking it out can cut your gums.
- The back molars — especially around wisdom teeth — are the tightest and hardest to reach, so they get skipped most often.
None of this means you should skip cleaning between your teeth. It means you need a tool designed for tight spaces.
The 5 Tools That Work for Tight Teeth
Not every interdental tool suits tight contacts. Here is how they compare, specifically for tight teeth.
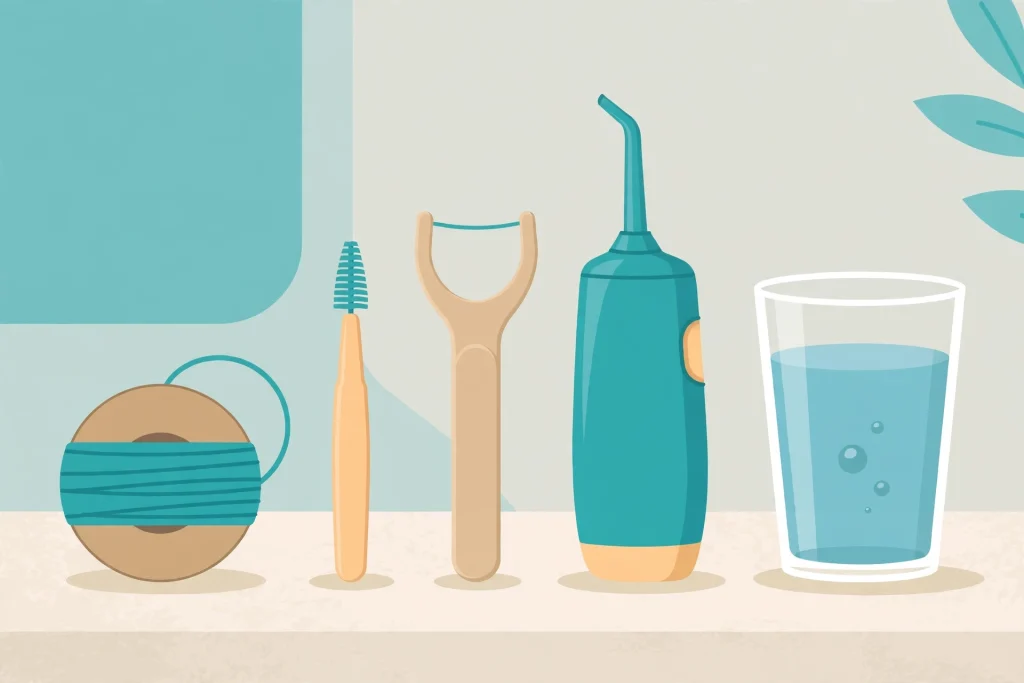
| Tool | Works for tight teeth? | Best for | Watch out for |
|---|---|---|---|
| Waxed or glide floss | Yes — the best first choice | Daily cleaning of every tight contact | Cheap unwaxed floss shreds; buy waxed or PTFE |
| Dental tape | Sometimes — thin tape works, thick tape doesn’t | Wide flat cleaning surface, gentle on gums | Thick tape won’t pass a very tight contact |
| Floss picks | Yes, with limits | Quick cleaning, travel, reaching back teeth | The short floss span frays faster; hard to curve properly |
| Interdental brushes | Only if they fit | Wider gaps, gum recession, bridges, implants | Never force one — if it doesn’t slide in easily, the size is wrong |
| Water flosser | As a supplement, not a replacement | Braces, bridges, implants, sensitive gums, back molars | Doesn’t scrape plaque off the tooth surface the way floss does |
A 2019 Cochrane review of 35 trials (nearly 4,000 adults) found that interdental brushes may reduce gum inflammation more than floss where they fit, that floss may reduce gum inflammation over 1 to 6 months, and that water flossers may calm gum inflammation in the short term but did not reduce plaque on their own. The practical takeaway matches what dentists say in the clinic: use whichever tool you will actually use every day — but for tight contacts, floss is still the tool that physically fits.
How to Floss Tight Teeth: The C-Shape Technique, Step by Step
Technique matters more than the brand of floss. Most people floss wrong — they saw the floss back and forth like a saw, or snap it straight down onto the gum. Both damage gums and miss plaque. Here is the method the ADA and NHS teach.
Step 1: Take enough floss
Break off about 45 cm (18 inches) of floss. Wind most of it around one middle finger and the rest around the other middle finger, leaving about 3–5 cm (1–2 inches) of floss stretched taut between your hands. You need a fresh, clean section for each gap, so keep unwinding as you go.
Step 2: Ease it in — never snap it
Hold the floss tightly between your thumbs and index fingers. Guide it between two teeth with a gentle back-and-forth (sawing) motion. The sawing is only to get through the tight contact point — slow, light pressure. Never snap the floss down onto your gum. That sudden drop is what cuts gums and causes bleeding.
If it will not go through at all, try a thinner floss — a waxed or glide floss, or a thin tape. If no floss passes, ask your dentist: a very tight contact, a rough filling edge, or a chipped tooth may be blocking it.
Step 3: Curve it into a C-shape
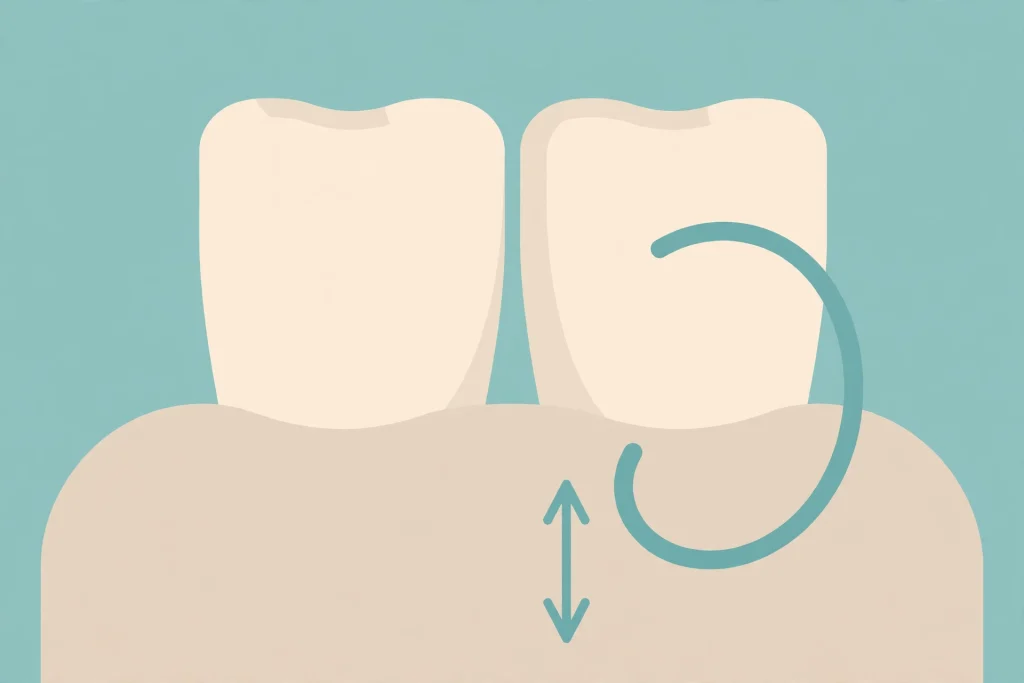
Once the floss is through the contact, curve it into a C-shape against one tooth — wrap it around the side of the tooth so it hugs the surface. This is the step most people skip, and it is the whole point: a straight floss only touches the contact point, while a C-shaped floss wipes the entire side of the tooth.
Step 4: Slide up and down, just below the gumline
Gently slide the floss up and down along the side of the tooth, going just below the gumline — about 2–3 mm under the gum edge. You should feel the floss against the tooth, not against the gum. Repeat 2–3 times on that side.
Step 5: Do the neighbouring tooth
Lift the floss back through the contact, curve it into a C-shape against the other tooth, and repeat. Every gap has two tooth surfaces to clean. Then move to a fresh section of floss and go to the next gap.
Step 6: Work in order, including the back teeth
Work systematically — for example, upper right to upper left, then lower left to lower right — so you don’t miss a gap. Do not skip the very back teeth. The contact between your last molar and your wisdom tooth (or where your wisdom tooth was) is usually the tightest and the most neglected — and the most likely to develop a cavity. Use your index fingers to guide the floss, and open wide.
Step 7: Rinse
When you finish, rinse your mouth with water or mouthwash to wash away the loosened plaque and debris.
The whole process takes 2–3 minutes once you are used to it. If your gums bleed the first week, that is common — it usually means the gums are inflamed from plaque, not that you are hurting them. Bleeding should settle within 1–2 weeks of daily cleaning. If it doesn’t, see your dentist.
Which Floss Is Best for Tight Teeth?
If floss shreds between your teeth, the problem is almost always the floss, not your technique. For tight contacts, choose:
- Waxed floss — the wax coating lets it glide through tight contacts instead of catching and fraying. The best all-round choice for tight teeth.
- Glide or PTFE floss — made from a smooth, single-filament material (similar to Teflon tape). It slides through very tight contacts where even waxed floss shreds. Slightly more expensive, but often the only floss that works for the tightest teeth.
- Thin dental tape — a flat, ribbon-like floss with a wide cleaning surface. Good if you like the feel of tape, but choose a thin tape; thick tape won’t pass a tight contact.
- Unwaxed floss — squeaks against clean enamel, which some people like as a signal, but it frays and shreds easily in tight contacts. Not the best choice here.
Avoid “expanding” floss for very tight teeth — it swells with saliva and can get stuck. And skip flavoured gimmicks; what matters is the material and thickness, not the taste.
If you have braces, a bridge, or an implant, ask your dentist about super floss — it has a stiff end for threading under wires or bridges, a spongy section for wider spaces, and a regular floss section.
Interdental Brushes: Only If They Fit
Interdental brushes are tiny bottle-brush tools that come in numbered sizes, from very fine (0.4 mm) to large. Where they fit, they are excellent — the Cochrane review found they may reduce gum inflammation more than floss. But the key phrase is where they fit.
For tight teeth, the rule is simple:
- If the smallest brush slides in easily, use it. Insert it gently, close to the gum, and move it back and forth 2–3 times. Never force it.
- If it doesn’t slide in, don’t push. Forcing a brush through a tight contact bends the wire, splays the bristles, and can damage your gums. That gap is a floss gap, not a brush gap.
- Bend small brushes slightly to reach the back teeth — most interdental brushes have a bendable neck for this.
- Rinse the brush after each gap and replace it when the bristles wear out, usually every 1–2 weeks.
Many people end up using both: floss for the tight front teeth, and an interdental brush for the wider gaps near the back or around gum recession. That combination is fine — use the right tool for each gap.
Water Flossers: A Useful Extra, Not a Replacement
A water flosser (oral irrigator) sprays a pulsating stream of water between your teeth and along the gumline. It is popular for good reasons: it flushes out food, it reaches the back molars easily, and it is gentle on sensitive gums. It is especially handy if you have braces, a bridge, or implants, or if handling string floss is difficult.
But it has a real limit: water does not scrape plaque off the tooth surface. Floss works by physical contact — the strand rubs the plaque biofilm off the side of the tooth. A water jet flushes debris away but leaves much of the sticky biofilm in place. That is why the evidence shows water flossers may calm gum inflammation in the short term but do not reduce plaque on their own.
How to use one well:
- Fill the reservoir with lukewarm water.
- Start on the lowest pressure setting and turn it up only as far as feels comfortable.
- Lean over the sink with your mouth slightly open.
- Aim the tip at the gumline, at roughly a 90-degree angle to the tooth.
- Move slowly from tooth to tooth, pausing about 2 seconds at each gap, including the back molars.
- Use it after flossing, not instead of it — floss scrapes, water flushes.
If you can only do one, do floss. If you enjoy the water flosser and it gets you cleaning between your teeth every day, use both.
Floss Picks: Convenient, With Limits
Floss picks — small plastic handles with a short span of floss — are better than not cleaning at all, and they make reaching the back teeth much easier. But they have two drawbacks for tight teeth:
- The floss span is short and fixed, so it frays faster and you cannot move to a clean section for each gap — you end up dragging plaque from one gap to the next.
- The rigid handle makes the C-shape hard, so you clean the contact point but often miss the sides of the tooth.
Use picks for travel, for a quick clean after a meal, or if arthritis or grip problems make string floss hard to hold. For your once-a-day thorough clean, string floss is still better.
What to Do When Floss Shreds or Gets Stuck
Floss getting stuck is common with tight teeth, and how you handle it matters.
If the floss shreds: Switch to a waxed or glide (PTFE) floss. Shredding usually means the floss is catching on a tight contact or a rough edge — a smoother, thinner floss solves it most of the time.
If the floss gets stuck: Don’t yank it. Yanking can snap the floss, leaving a shred behind, or cut your gum. Instead, gently work it back out with the same slow back-and-forth motion you used to get it in. If it is truly stuck, try sliding it out sideways toward the cheek or tongue, or use a floss pick to hook it out.
If the same gap shreds floss every time: That gap may have a rough filling edge, a chipped tooth, a sharp crown margin, or tartar buildup at the contact. Your dentist can smooth the edge or remove the tartar in minutes. Repeated shredding in one spot is worth a dental visit — it is also a sign that plaque is collecting there.
If a shred stays behind: Try to remove it with a fresh piece of floss or a water flosser. If you cannot get it out, don’t dig at your gum with a toothpick or pin — see your dentist. A trapped shred will irritate the gum and collect more plaque.
The Hardest Spot: Back Molars and Wisdom Teeth
The contact between your second molar and your wisdom tooth is the hardest gap in your mouth to clean — and the most important. It is the tightest, the furthest back, and the easiest to skip. Food and plaque collect there, and because you cannot see it, problems develop silently.
- If your wisdom teeth are fully erupted and healthy, clean behind them the same way as any other tooth — floss the contact, curve the floss around the back of the wisdom tooth, and slide it below the gumline.
- If a wisdom tooth is partially erupted, a flap of gum (operculum) often covers part of the tooth, trapping food and bacteria underneath. Floss gently around it and rinse with warm salt water after eating. If the area keeps getting sore or swollen, see your dentist — it may be pericoronitis, an infection of that gum flap. Our guide to the first signs of wisdom teeth coming in explains what to watch for.
- If you had a wisdom tooth removed, do not floss or poke the socket. For the first week, follow your surgeon’s instructions — usually gentle salt-water rinses only. After about a week, your surgeon may recommend a curved-tip irrigation syringe to flush food from the socket. Our guide on when to use a syringe after wisdom teeth removal covers the timing and technique.
- If a wisdom tooth is impacted or crowded against the molar, floss may not pass at all. Don’t force it — ask your dentist whether the tooth needs monitoring or removal. A cavity forming between an impacted wisdom tooth and the molar next to it is one of the most common reasons wisdom teeth are removed.
6 Mistakes to Avoid When Cleaning Between Tight Teeth
- Snapping the floss down onto the gum. This cuts the gum and causes bleeding. Ease it through the contact with a gentle sawing motion.
- Sawing back and forth once the floss is in. Sawing cleans the contact point but not the tooth surfaces. Curve the floss into a C-shape and slide up and down.
- Using the same section of floss for every gap. You move plaque from one gap to the next. Unwind a fresh section for each gap.
- Skipping the back teeth. The last molars and wisdom teeth are where cavities between teeth most often start.
- Forcing an interdental brush through a tight contact. If it doesn’t slide in easily, that gap needs floss, not a brush.
- Only cleaning when food is stuck. Plaque forms every day whether or not you feel food there. Clean between your teeth once a day, every day — even when nothing feels stuck.
How Often, and Before or After Brushing?
Once a day is enough — the ADA recommends cleaning between your teeth once daily. More often is fine, but daily is the target that matters.
As for order: the ADA says it does not matter much whether you clean between your teeth before or after brushing, as long as you do it thoroughly. Flossing first has one small advantage — it clears the gaps so fluoride from your toothpaste can reach between your teeth. Our full routine guide explains the order in detail: How to Clean Your Teeth at Home.
Pick a time you will stick to. Most people find evenings easiest — it becomes part of the bedtime routine, and your teeth stay clean overnight when saliva flow drops and bacteria are most active.
When to See a Dentist
Daily cleaning between your teeth prevents most problems, but some signs mean it is time for a professional look:
- Gums bleed for more than 1–2 weeks of daily gentle cleaning — this can be an early sign of gum disease.
- Floss shreds or gets stuck in the same gap every time — a rough filling, chip, or tartar buildup may need smoothing.
- Floss won’t pass through a gap at all — the contact may be too tight, or a tooth may have shifted.
- Persistent bad smell or taste from one area — food or plaque trapped between teeth can cause localised bad breath. Our guide to bad breath after tooth extraction covers breath problems after surgery, but a bad smell from one gap between healthy teeth also deserves a check.
- Pain when flossing, or a gap that suddenly feels different — a new cavity between teeth often shows up first as pain or a changed feeling when you floss.
- Gum recession or a gap that is getting wider — spaces between teeth change over time, and your cleaning tools may need to change with them.
Cavities between teeth are hard to spot yourself — they often show up only on X-rays. That is another reason to keep up with regular dental checkups: your dentist can see what you can’t. Our guide to cavity teeth explains how decay between teeth develops and how it is caught early.
Frequently Asked Questions
Can I use a water flosser instead of floss for tight teeth?
A water flosser helps, but it should not fully replace floss for tight teeth. Floss physically scrapes plaque off the sides of your teeth; water flushes debris but leaves much of the sticky plaque biofilm behind. If handling floss is genuinely difficult for you, a water flosser is far better than nothing — but the best result comes from using both.
Why does my floss keep shredding?
Usually the floss is too thick or too rough for your contacts. Switch to a waxed floss or a smooth glide (PTFE) floss. If the same gap shreds every brand of floss, the cause may be a rough filling edge, a chip, or tartar — your dentist can fix that quickly.
Does it hurt to floss tight teeth?
It shouldn’t. A little pressure as the floss passes the contact is normal; sharp pain is not. Pain usually means you are snapping the floss onto the gum, or there is already inflammation or a cavity in that gap. Ease the floss through gently, and if pain persists in one spot, get it checked.
How do I clean between my back teeth if I can’t reach?
Use a floss pick — the handle gives you the extra reach — or wrap the floss around your index fingers instead of your middle fingers for a shorter working length. An interdental brush with a bent neck also reaches back teeth well, if the gap is wide enough for it. A water flosser is the easiest option for the very back molars.
Is it normal for gums to bleed when I start flossing?
Yes, for the first week or so. Bleeding usually means the gums are inflamed from plaque buildup, and it should settle within 1–2 weeks of daily gentle cleaning. If bleeding continues beyond that, or gums are swollen and sore, see your dentist — it may be early gum disease.
Should I floss before or after brushing?
Either is fine, according to the ADA. Flossing first has a small advantage: it clears the gaps so fluoride from your toothpaste can reach between your teeth. What matters most is doing it once a day, every day.
What if floss won’t fit between two teeth at all?
Try the thinnest option — a glide (PTFE) floss or thin tape. If nothing passes, don’t force it. Ask your dentist at your next visit: the contact may be exceptionally tight, or a filling or tooth movement may be blocking it. Your dentist can check whether that gap needs a different tool or treatment.
The Bottom Line
Tight teeth are not an excuse to skip cleaning between them — they are the reason to do it properly. Use a waxed or glide floss, ease it through the contact instead of snapping it, curve it into a C-shape against each tooth, and clean every gap once a day — including the back molars and wisdom teeth. Add an interdental brush where it fits and a water flosser if you like, but floss is still the tool that fits the tightest spaces.
Two to three minutes a day is all it takes. Your gums, your molars, and your next dental checkup will all be better for it.
Sources
- American Dental Association — Flossing and cleaning between teeth (ADA)
- NHS — How to floss and care for your teeth and gums
- Worthington HV, MacDonald L, Poklepovic Pericic T, et al. Home use of interdental cleaning devices, in addition to toothbrushing, for preventing and controlling periodontal diseases and dental caries. Cochrane Database of Systematic Reviews 2019, Issue 4.
- Cleveland Clinic — Water flossers: how to use them and when they help
This article is for general information only and is not a substitute for advice from your own dentist. If you have pain, bleeding that won’t stop, or a gap you cannot clean, book a dental appointment.